
polytunnel
Polytunnel: The Complete Guide — Benefits, Sizes and More Productive Alternatives
Polytunnel guide 2026: benefits, sizes, prices, growing calendar and a more productive hydroponic alternative. Everything to choose, install and profit from your garden tunnel.
One April morning, near Angers in France. Sophie looks at her tomato plants. They turned yellow overnight. On her kitchen windowsill, eighteen pots compete for the light — and outside, the season won’t wait.
You may know this scene. You may even be living it right now: seedlings overflowing from the house, plants shivering, and that feeling of always chasing the calendar. So here is the answer, right away. A polytunnel turns solar radiation into a microclimate: it lets you sow as early as February, harvest sometimes into November, and watch tomatoes and lettuces alike escape the rain, the wind and the hail. Budget-wise, the 2026 guides put a quality film tunnel between €150 and €800 for 15 to 30 m² (Serre2Jardin) — a surface-to-price ratio no rigid greenhouse comes close to, at least on the hobby market.
€150 to €800. That’s it.
This guide details what you should check before pulling out your credit card: how it works, dimensions, structure, assembly, calendar, maintenance, return on investment. And, because this is precisely our field, a hydroponic option capable of producing several times more on the same ground footprint — with its real numbers, not its slogans.
A word about our sources, because that’s rare on this topic and it matters. Prices, lifespans, yields: everything comes from specialist guides and vendors — in other words, orders of magnitude born of experience, not official statistical averages. The “INRA”, “Ifop” or “Ministry of Agriculture 2021” figures that some blogs copy? We searched for them with the organizations concerned. Not found. We discarded them rather than recycle them. The regulatory points link to the official portals (service-public.fr, vigieau.gouv.fr). Every sensitive figure is attributed to its source, and flagged when it rests on a single player. You’ll always know what is solid — and what deserves your own verification.
Table of contents
- What is a polytunnel?
- Choosing your polytunnel: the 5 criteria that matter
- Installing your polytunnel with no nasty surprises: 6 steps, 1 day
- What to grow in a polytunnel? The complete calendar
- Producing 500 kg on 22 m²: the hydroponic option
- Budget and profitability: the true cost of a polytunnel
- FAQ
- Summary and next step
What is a polytunnel? How it works, without the jargon
Definition and thermal principle
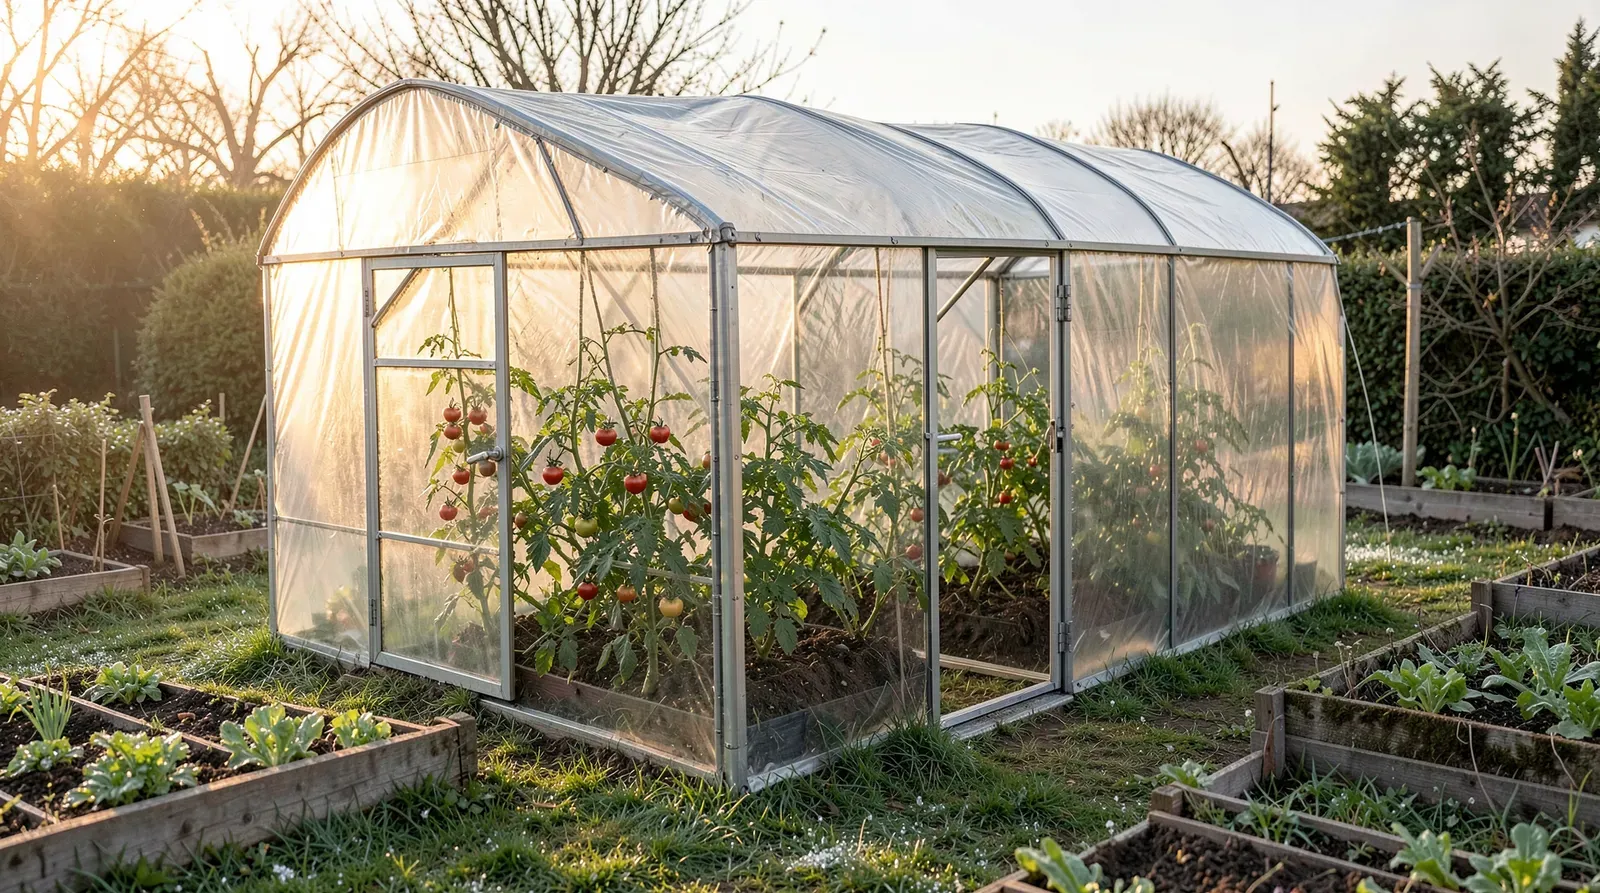
Strip a garden greenhouse of everything superfluous. Three elements remain: curved galvanized steel hoops anchored into the ground; a continuous horticultural cover stretched over the top; a door on one gable end, sometimes two. There you have the essence of a polytunnel — also called a hoop house or plastic tunnel; all three terms say the same thing (Mantis, Habitats Durables).
Its arched silhouette is no aesthetic whim. It offers maximum volume for minimum structure. Hence a price per m² far below that of a glass greenhouse or a rigid polycarbonate one.
The principle fits in three sentences. The film lets the solar radiation in. The soil and the plants absorb it, then give it back as heat, part of which the cover retains. The result is warmer air — but also more humid — and it is this temperature/humidity pairing that accelerates growth.
On how big the gain is, the guides diverge — we might as well say it plainly. Mantis claims 5 to 10 °C; Serre2Jardin sticks to 3 to 5 °C. The gap is probably explained by conditions: the top of the range corresponds to a closed tunnel in full sun, the bottom to overcast weather or a ventilated greenhouse. No instrumented French study has been published to settle the question. Treat these values as orders of magnitude from horticultural experience, not as certified measurements.
And what does that change for you? One simple thing: your tunnel’s performance will depend on your site and your ventilation — not just on the kit you buy.
This gain shifts the whole calendar, and that’s the key point: sowing from February–March, harvests pushed back to November, even December in temperate regions (Mantis). The 2026 guide from Habitats Durables sums up the tunnel’s role in one apt formula: securing harvests against hazards — intense rain, wind, late frost, early heatwave — that hit open-field vegetable gardens more and more often.
Key takeaway: a polytunnel doesn’t heat — it banks the sun. Its performance therefore rests on three parameters you can act on directly — the site’s sunlight, the tightness of the structure, and the management of ventilation.
[Suggested illustration: annotated cross-section of a polytunnel — alt: “polytunnel: galvanized steel hoops, plastic cover, microclimate heated by the sun”]
A shelter, then. But not all shelters are equal — and the market offers three very different families of them.
The three families of tunnels on the market
The market splits by cover type. The polyethylene (PE) film tunnel dominates by far: the film diffuses light evenly and creates the warm, humid microclimate sought in market gardening (Serre2Jardin). It’s the choice for surface-to-price ratio. The polycarbonate panel tunnel remains little known even though it deserves more attention: 15 to 20 years without replacing the panels, better insulation, for a cost 3 to 5 times higher than the plastic tunnel (same source).
Fifteen years, minimum.
Hybrid tunnels, finally, play the modularity card: anti-frost cover in winter, shade netting in summer, or polycarbonate gable ends to stiffen the whole structure (Habitats Durables, Les Serres du Cédon).
Shape matters as much as cover. France Serres contrasts the classic “half-moon” model with the “straight-side” model, whose walls stay vertical for 1.20 to 1.80 m. You feel the difference as soon as you bend down to weed the far corner:
| Half-moon | Straight sides | |
|---|---|---|
| Usable volume | Reduced at the edges | Maximal, including for tall crops |
| Working comfort | Limited at the sides | Easier movement and plant training |
| Thermal inertia | Low | Better (buffer air volume) |
| Wind exposure | Low | Higher: bracing essential |
| Price | More affordable | Higher |
You’ll spot it quickly in the shop: for the same floor area, the half-moon looks cheaper — until you calculate the volume you can actually use.
The range runs from the mini-tunnel covering a single growing bed (lettuces, early radishes) to the market-garden tunnel of several dozen m², taking in raised balcony greenhouses and family tunnels of 12 to 30 m² along the way (Habitats Durables).
All that remains is to know which of these families fits you. Not a theoretical gardener — you.
For which gardener, for which use?
Three profiles, three surface areas. For each one, first look for the sentence where you recognize yourself.
You’re a beginner, and your hand doesn’t yet know what it wants. The 6 to 9 m² formats suit beginners and urban gardens — Mantis estimates they hold “20 to 30 tomato plants or the equivalent”. Big enough to learn, sow, harvest. Small enough not to ruin the experiment.
You’re already harvesting every summer weekend, and you want more. The 12 to 18 m² formats, organized into two growing rows around a central path, match regular gardeners who practice rotation and diversification. The family format: enough to vary the crops, compact enough to stay manageable.
Your goal is for the plate to come from the garden. Beyond 24 m², you enter partial food self-sufficiency, with potting benches, irrigation and storage space (Mantis).
And don’t forget what the tunnel becomes the rest of the time: a workshop. Sowing, potting on, cuttings, overwintering potted citrus, storing equipment (Habitats Durables). An often-underestimated argument: a well-sized polytunnel on its own replaces a garden outbuilding — and that seed-starting window that takes over your home every spring. You know, the line of pots on every windowsill, the cat knocking over a seedling, the race between the radiator and the light.
These ranges give a direction. But choosing means deciding on precise figures — and that’s exactly what the next section does.
Choosing your polytunnel: the 5 criteria that matter
A garden tunnel is judged on five points, in this order: floor area (and its layout), the frame, the cover, the full price — then the final choice between the big options. Each criterion eliminates models. Follow them one by one.
Floor area: four tiers, then your plan
There’s a mistake almost everyone makes: buying the surface that fits the budget, then discovering in June that the greenhouse is already full. To avoid it, the most widespread grid — the one in the 2026 guide from Habitats Durables — cuts the market into four tiers. From 6 to 10 m², you get your feet wet: tomatoes, lettuces, herbs, seedlings. From 10 to 18 m², a couple or a family aims for a serious supply of vegetables. From 18 to 30 m², the goal slides toward partial self-sufficiency. Beyond 30 m², you move into intensive or semi-professional territory.
But a tier is no substitute for a plan, and that’s where many buyers go wrong. The Habitatio guide rightly criticizes standardized ratios: a greenhouse for six tomato plants doesn’t have the same layout as a seed-starting space with benches or an overwintering shelter. Its more cautious method comes down to three steps: measure your plants at adult size, draw the growing zones, circulation paths and openings, then keep only a zone whose use is genuinely defined.
Two physical benchmarks command consensus. A usable height of at least 2 m, to move around, train tomatoes and hang netting and strings; a width of 3 to 5 m, to fit two or three beds with a comfortable central path (AutourduPotager). Shape matters here: a half-moon 2 m wide sacrifices an unusable strip on each side, while a straight-side model of equal floor area keeps it.
Put concretely: in a small half-moon, you’ll never plant anything at the edges. You’ll pay for them all the same.
Once the format is chosen, the real question becomes technical: what holds up against the wind — and what holds up over time?
Structure and cover: the specifications to demand (25 mm, 200 micron)
The day the storm rolls through, you won’t be there to tighten anything. What holds will be what you bought. Hence two families of specifications to check line by line.
On the frame side, the standard remains galvanized steel. Mantis recommends tubes of at least 25 mm in diameter with a wall thickness of 0.6 mm minimum for the hobbyist, while 2026 professional models go up to 1.5–2 mm (Les Serres du Cédon). Hoop spacing — the gap between two hoops — is the most frequently cited anti-wind lever: 1 to 1.5 m (AutourduPotager). Check this point on the spec sheet before any purchase: it cannot be corrected after the fact.
On the cover side, the reference greenhouse film is a 200 micron polyethylene with anti-UV treatment, whose light transmission is said to reach 85 to 90% (Mantis). And this cover ages. In November, a tired film is recognizable from afar: it whitens, it cracks at the slightest fold, it flaps in the wind like an old flag. The lifespan table compiled by Serre2Jardin says it all:
| Cover | Use | Lifespan |
|---|---|---|
| Basic PE | Seasonal | 1 season |
| Anti-UV PE | Multi-season | 3–4 years |
| Anti-UV + anti-drip PE | Optimal for crops | 4–5 years |
| Thermal PE | Cold regions | 3–4 years |
Keep in mind a range of 3 to 5 years for a standard film, up to 7–8 years for a professional reinforced cover — Mon Jardin Mon Potager cites pro films at 7–8 years, with UV warranties often limited to around 4 years. Replacement costs €50 to €200 depending on floor area: build it into the purchase calculation from day one — it’s the number one forgotten cost item.
Every 3 to 5 years. Not just once.
An honest caveat: these lifespans aggregate editorial opinions; the manufacturer’s UV warranty remains the only reliable contractual benchmark. A vendor who doesn’t publish the UV warranty of their film is telling you something. Listen.
Frame and cover set the quality. Price, for its part, depends above all on what the spec sheet doesn’t mention.
The real price: 6 hidden costs beyond the initial cart
You know this mechanism by heart — the displayed price, then the bill that arrives. The 2026 ranges read by segment. At entry level, €80 to €500 buys a tunnel of up to 18 m² (Mantis). Les Serres du Don put a 6–12 m² “Classic” tunnel at €150–400, and a reinforced “Pro” of 12–20 m² (reinforced frame, 200 micron cover) at €500–1,200. The professional segment runs at €40 to €75/m².
The displayed price, however, is never the real price. Habitatio lists six cost items that escape the initial cart: gable ends, base frames or vents sold separately; anchoring and ground preparation; vents and shading; irrigation and growing medium; delivery of long, fragile parcels; spare parts. Its recommendation deserves to be applied as is: demand three quotes with an identical scope (delivery, base, anchoring, vents, assembly, warranty) before comparing anything.
Copy this list. It beats all the comparison charts.
The table that settles the five options
Everything above boils down to a single table. Keep it in front of you when comparing models.
| Option | Indicative price | Cover lifespan | Insulation | For whom |
|---|---|---|---|---|
| PE film tunnel | €150–800 (15–30 m²) | 3–5 years (film) | Low (cited gain of 3–5 °C) | Beginner to regular gardener |
| Pro reinforced-cover tunnel | €40–75/m² | 7–8 years (film) | Low to medium | Semi-pro, large families |
| Polycarbonate | 3 to 5 × the price of film | 15–20 years | Superior | Long-term installation |
| Rigid glass | €150–400/m² | Very long | Good | Ornamental garden, large budget |
| Hybrid (cover + netting) | €300–800 (12 m²) | Depends on cover | Modular | Climates with contrasting summer/winter |
Sources: Serre2Jardin, La Ferme du Fays, Les Serres du Cédon, Les Serres du Don. Commercial figures, to be confirmed by quote.
For a gardener looking for the best value polytunnel in 2026, the optimal point seems clear: a film tunnel on galvanized framing of 25 mm and up, 200 micron anti-UV cover, tight hoop spacing, in the 12–18 m² format. To be honest about it: this is a consensus of guides, not the verdict of a comparative test — no independent study ranks the models against one another.
One step remains where the guides contradict each other head-on — and where a mistake can cost you the greenhouse itself: installation.
Installing your polytunnel with no nasty surprises: 6 steps, 1 day
Location and orientation: where the guides contradict each other
A badly placed tunnel is an expensive greenhouse growing shade. Yet three criteria command unanimous agreement. Maximum sunlight, with no cast shadow from a building, hedge or tree — check winter shadows with particular care, when the sun skims the horizon. Shelter from the prevailing winds, without stifling the garden’s air circulation. And proximity to water (Habitats Durables, Habitatio). The ground must be easy to level and must drain water without stagnation.
On orientation, however, the sources flatly contradict each other — so let’s show you. Habitats Durables argues for a north–south axis, which spreads the light across the day. Mantis recommends east–west to maximize exposure. AutourduPotager offers a conditional synthesis: east–west in a cold climate to capture the winter sun, north–south in hot summer to spread the shade. Habitatio rejects any absolute rule — latitude, slope, obstacles and growing season change the outcome. Our position is closer to the latter: map your shadows in winter and summer, confront the placement with the prevailing winds, then follow the manufacturer’s instructions. AutourduPotager’s cold/hot heuristic remains a good starting point. Deciding for you would be dishonest: your ground decides, not the guide.
Last point, too often forgotten: water. During restriction periods, watering vegetable gardens is regulated — check the official VigiEau map before installing, and if possible plan a rainwater reserve sized to the tunnel’s roof surface. Your plastic roof is a free water collector. Size the tank to it.
Location is settled. What remains is the ground — and the anchoring, where tunnels die.
Ground and anchoring: what decides the lifespan
A broadly flat plot simplifies everything; slight slopes are handled with simple earthworks or ground beams, those foundation beams that correct the level (Habitats Durables). Clear the site before assembly — weeds and stones — then enrich it with compost and well-rotted manure, the preparation recommended by organic growing guides such as Lutte Bio.
For anchoring, AutourduPotager distinguishes three situations: screwed-in or driven-in feet in stable ground, concrete base plates on exposed sites, and a cover skirt buried 30 to 40 cm deep to eliminate the air intakes under the tunnel. This last detail is paid for dearly in the first storms when it has been neglected. Habitatio’s golden rule fits on one line: follow the manufacturer’s instructions for foundation and anchoring, and never modify the bracing without validation — the advertised wind resistance assumes a compliant structure.
Wind is the garden tunnel’s number one enemy. Neglected anchoring is invisible — until the first storm.
Ground ready, anchoring chosen. What remains is assembly, and the question everyone asks: how long, really?
Assembly in 6 steps: one day, two people
Let’s be transparent: the guides describe the sequence, but no photo/video tutorial from a verifiable source could be retained. Habitats Durables’ canonical sequence comes down to six steps:
- Marking out on the ground, placing the stakes or anchoring base plates.
- Assembling and positioning the hoops.
- Installing the ridge bars and the bracing.
- Positioning and tensioning the cover.
- Assembling the gable ends (doors, windows, bracing).
- Final adjustments: tension, tightening, alignment.
Serre2Jardin quotes about one day for a 6 × 3 m model — a commercial figure, but consistent with the buyer feedback synthesized in the guides. In practice, count on six to eight hours for two.
One day. Two people.
Plan for two people to handle the parts, a passable access route for the delivery (the parcels are long and fragile), and calm weather to stretch the cover. In the field, it’s the tension that separates a tunnel that lasts from one that flaps and tears: this is the step not to rush.
Your tunnel is standing. One thing remains to sort — the costliest if you ignore it, because it gets sorted before the order, or never.
The 6 mistakes that cost dearly
The guides converge on the same missteps, all avoidable before purchase.
The first: buying before thinking through ventilation and shading. A greenhouse can climb well above the outdoor temperature; vents and shade screens get decided when choosing the model, not afterwards (Habitatio). Next come anchoring that is undersized against the wind — the garden tunnel’s number one enemy — and forgetting the planning formalities: check the local development plan (PLU) before ordering (see FAQ).
Third classic trap: saving on the cover — a PE film without anti-UV treatment lasts a single season.
One season. You had planned for ten years.
Add to these crop overcrowding — in a confined space, diseases advance as fast as the plants, keep walkways that can breathe — and neglect of the cover/structure friction points, which wear the film away in silence. Plan for foam padding or protective tape.
These mistakes are sorted out with one spec sheet and one visit to the town hall. Once that’s done, you can finally talk growing — and the calendar that follows will surprise you.
What to grow in a polytunnel? The complete calendar
The crops that benefit most from the shelter
There’s a moment every tomato gardener knows: the cool year when the open field ripens nothing before September. It is precisely against that moment that the tunnel is tailored to heat-hungry species: tomatoes, peppers, aubergines, cucumbers, courgettes (Serre2Jardin). There, the shelter pays off most — these solanaceae and cucurbits stall in the open field in cool years. To that, add early sowings for the whole vegetable garden and late-season crops.
On yield gains, caution remains the rule. Mantis claims +30 to 50% compared with equivalent outdoor growing, and 5 to 8 kg of tomatoes per plant under cover versus 3 to 5 kg in the open field. These figures come from a single, commercial source, with no published methodology: treat them as an optimistic potential, not a promise. The safest lever remains disease prevention: rotation over 3–4 years (Solanaceae → leafy vegetables → Legumes → Cucurbits) and companion planting (basil, French marigolds at the foot of the tomatoes) (AutourduPotager).
Month-by-month production calendar
The Habitats Durables and AutourduPotager calendars overlap almost line for line. Here’s the synthesis — copy it:
| Period | Sowing / planting | Precautions |
|---|---|---|
| February–March | Sowing: tomatoes, peppers, aubergines, lettuces, spinach, radishes | Ventilate during the warm hours, watch out for night frosts |
| April–May | Planting out the transplanted seedlings, basil | Sturdy stakes, regular watering, mulching |
| June–August | Cucumbers, dwarf beans, courgettes, mesclun | Shading, maximum ventilation |
| Sept.–Nov. | Winter lettuces, lamb’s lettuce, rocket, spinach, chicories, radishes | Reduce watering, close early to store the heat |
| Winter | Hardy crops in place, lamb’s lettuce, some lettuces | Minimal ventilation on dry days |
Harvesting 12 months out of 12
January, 8 a.m. Outside, the vegetable garden sleeps under frost. Inside the tunnel, you pick a handful of lamb’s lettuce for lunch.
Yes, the plastic tunnel stays up all year and is grown through the four seasons — provided you accept its logic. In winter, as Mon Jardin Mon Potager puts it, the greenhouse “doesn’t manufacture sun”: it protects against moderate frost, wind and excess water on the foliage, but growth slows sharply. The tunnel preserves; it doesn’t restart.
The right reflex is to install the winter crops before the days get too short. On the trays: lamb’s lettuce, spinach, winter lettuces, rocket, baby leaves. To gain a few degrees, layer your protections — a horticultural fleece inside the tunnel creates a double wall of air. And keep a minimal air circulation on dry days: condensation, not cold, is the real enemy of winter crops under cover.
That’s enough to stretch the season from one end of the year to the other. But if your ambition goes beyond stretching — producing far more, on the same surface — there’s another path. With its numbers. Not its slogans.
Producing 500 kg on 22 m²: the hydroponic option
Once the tunnel is chosen, another question quickly follows: how to produce more on the same ground footprint? The most game-changing answer on today’s market is hydroponics — soilless growing, in a recirculating nutrient solution, often organized as closed loops under cover. It’s our field, so let’s own it: we prefer to present it with its real numbers rather than its slogans.
So let’s be precise. Industry suppliers readily claim yields multiplied by 3 to 10 per m², thanks to vertical growing and shorter cycles. These values come from commercial documentation, not independent French studies: read them as observed maximums on short-cycle crops (leafy greens, herbs, strawberries). Claiming otherwise would be lying to you — and you would feel it.
But even taking the low-end assumption, the gap with soil growing remains major, for three structural reasons. Plants grow on vertical towers: you grow in height, not just across the ground. Cycles shorten: no water stress, no root competition. And the water recirculates — a massive saving compared with soil watering, precious during restriction periods (VigiEau). Hydroponics also eliminates soil-borne diseases, which cuts losses and simplifies rotation.
The counterpoint has to be owned up to: regular technical monitoring (pH, conductivity, solution renewal), without which production collapses as fast as it would have climbed. That’s the honest other side of the deal. If you don’t want that monitoring, stick with a soil tunnel — it’s excellent, as this guide has shown you.
The vertical tower: 36 plants on less than one square metre
Remember the classic lettuce row: a dozen heads on one square metre, a single layer. Now stack them. The vertical tower is the building block of this approach: a column into which the plants slot into pockets all around it, from base to top. Where one m² of ground carried a dozen lettuces, a tower 1.5 to 2 m tall carries several dozen, with a ground footprint of less than a square metre.
In practice, you reserve the tunnel’s perimeter for climbing or tall crops (tomatoes, cucumbers in soil or in gutters) and organize the centre in rows of towers for leafy greens and herbs — the configuration offered by the 15 to 30 m² hydroponic greenhouse kits. Light remains the limiting factor: towers placed near the glazed gable ends or in the tunnel’s brightest zones visibly perform better.
22 m² of greenhouse, 500 kg of vegetables a year: where does this figure come from
Five hundred kilos is a crate of vegetables a week, fifty-two weeks out of twelve months. It’s the figure the equipment makers attach to a 22 m² hydroponic greenhouse fitted with vertical towers. Rather than take it or throw it out, let’s break it down. Simulation assumptions: 14 towers of 36 pockets (504 plants in place), lettuce-type leafy crops with a 5-week cycle, i.e. 8 effective cycles per year once recovery periods and the winter slowdown are taken into account; average usable yield of 125 g per plant. The calculation gives 504 × 8 × 0.125 ≈ 505 kg/year.
Read that calculation again. Every assumption is right there.
Now let’s compare with the same footprint in a classic tunnel. A 21 m² soil tunnel hosts 12 to 16 tomato plants (Serre2Jardin) which, at the optimistic yield of 5–8 kg/plant cited above, give 60 to 130 kg of tomatoes per season, other crops excluded. The gap comes from no agronomic miracle: it comes from an engineer’s logic — verticality, short cycles, no dead season.
Transparency: this 500 kg figure is an order-of-magnitude simulation, not a guarantee. It depends on your crops, your climate, and your diligence in monitoring the nutrient solution. It illustrates the potential of a properly run setup.
👉 Fancy moving up from the classic tunnel to intensive production? Configure your 22 m² hydroponic greenhouse in our online configurator: number of towers, crops, irrigation — you’ll receive a complete turnkey quote.
All that’s left is the question you’re already asking yourself: how much does it really cost — and when does it become profitable?
Budget and profitability: the true cost of a polytunnel
Price ranges by product line
Two budgets exist: the purchase price, and the cost of ownership. The second contains the first — and everything else. First, here are the prices observed in 2026:
| Product line | Typical floor area | Observed prices 2026 |
|---|---|---|
| Mini-tunnel / beginner | 2–6 m² | €80–150 |
| Family PE film tunnel | 6–18 m² | €150–500 |
| Reinforced “Pro” tunnel | 12–20 m² | €500–1,200 |
| Market-garden tunnel | 30 m² and up | €40–75/m² |
| Polycarbonate | 6–15 m² | 3 to 5 × the price of film |
| Rigid glass greenhouse | 6–12 m² | €150–400/m² |
Sources: Mantis, Les Serres du Don, La Ferme du Fays. To these purchase costs, add the most predictable line in the budget: replacing the cover every 3 to 5 years (€50 to €200) (Serre2Jardin).
Estimate your real savings (3 lines, not 30)
The warning from Habitatio is worth repeating almost word for word: don’t build a standard “annual vegetable saving” into your calculations, because real output depends on your crops, your climate, your available time and the purchases you actually avoid. The honest method fits in three lines. Cost out your full cost of ownership (purchase, anchoring, irrigation, replacement films). Estimate your plausible production in kilos, using the benchmarks above. Multiply by the price you actually pay for these vegetables in the shops — for organic, count on a weighted average of €4 to €6/kg, an assumption to adjust against your receipts.
Illustrative example (a simulation, not a promise): a 12 m² family tunnel costing €450 installed, producing 60 kg/year of tomatoes and lettuces that you would otherwise buy at €5/kg organic, avoids €300/year — pleasure and quality aside.
€300. That’s two-thirds of the greenhouse, recovered every year.
Payback period: the formula in one division
The formula comes down to one division: full cost of ownership ÷ real annual savings. On the example above, €450 ÷ €300/year ≈ 1.5 years. That’s why the film tunnel is often presented as the most profitable vegetable-garden investment — provided you actually produce.
For a 22 m² hydroponic greenhouse, the initial investment rises noticeably and payback depends on the configuration: number of towers, chosen crops, any direct-sale revenue. With a production volume in the order of 500 kg/year, the volumes do the work; good practice remains to request an itemized quote and redo the calculation on your own consumption or resale assumptions. The guides in the corpus publish no validated professional ROI: any “turnkey” payback figure you come across deserves to be questioned.
The figures are on the table. Seven questions remain that almost everyone asks before ordering — here they are, with direct answers.
FAQ — Your questions about the polytunnel
What surface do you need?
To get started, a 6 to 10 m² polytunnel is more than enough: it takes the seedlings, a few tomatoes, lettuces and herbs. A couple or a family aiming for a real supply of vegetables will go for 10 to 18 m², and partial self-sufficiency comes into play around 18–30 m² (Habitats Durables). Whatever the size, aim for 2 m of usable height and 3 to 5 m of width.
Do you need planning permission?
Under the general framework of the French Town Planning Code applying to new constructions, a polytunnel of 5 to 20 m² of ground footprint requires a prior declaration (déclaration préalable) filed at the town hall, and planning permission beyond 20 m² (art. R. 421-9, available on Légifrance and explained on service-public.fr). Below 5 m², no formalities in the general case. Careful: stricter rules apply in protected areas and depending on your local development plan (PLU), and a development tax may be added — always check with the town hall before buying. Some guides cite different height thresholds; the reference threshold is the ground-footprint one, confirmed on the official portals.
Can you use it in winter?
Yes: a polytunnel stays up and is grown in all year round, provided you accept a ventilation and monitoring routine (Mon Jardin Mon Potager). In winter, it protects against moderate frost and excess water but doesn’t grow anything actively: plant lamb’s lettuce, spinach and winter lettuces in autumn, layer a fleece inside during hard freezes, and keep a minimal aeration on dry days. Supplementary heating is considered rarely worthwhile for hobby use (cost, humidity) by all the guides consulted.
How many kg of vegetables per year?
No official or independent source in the corpus publishes a kg/year figure for a complete tunnel — a genuine gap, acknowledged here. The available benchmarks: in soil, a 21 m² tunnel growing tomatoes alone would produce in the order of 60 to 130 kg per season (cross-referencing Serre2Jardin and Mantis data, indicative extrapolation); in vertical hydroponics, a 22 m² setup is presented by the equipment makers as capable of reaching ~500 kg/year of leafy crops (simulation detailed above, assumptions included). Reason in terms of growing surface and your household’s needs, not in promised kilos.
What maintenance should you plan for?
Four recurring routines are enough. A gentle clean of the cover (warm water, no abrasives) every season, to preserve light transmission. A check of the fixings after every windstorm. A re-tensioning of the cover and a check of the friction points. A clean-up at the end of each cycle: weeding, black soap on the structures, repair of the eyelets (AutourduPotager, Habitats Durables). Add film replacement every three or four years depending on exposure: a film that whitens or turns brittle at the fold is at the end of its life.
What’s the best value polytunnel in 2026?
The best value for money lies in a film tunnel in galvanized steel (tubes ≥ 25 mm, hoop spacing 1–1.5 m), 200 micron anti-UV PE cover, in the 12–18 m² format: this is the crossing of the structural recommendations of Mantis and AutourduPotager with the prices observed at specialist vendors (€150–500). Prefer a model with spare parts available and a cover with a UV warranty of at least 4 years.
Can you leave the tunnel up all year round?
Yes, and it’s the recommended use: the tunnel protects the soil from winter rain and hosts hardy crops. Two conditions: a structure and anchoring sized for your climate (wind, heavy snow), and a ventilation routine. On very exposed sites, some guides suggest partially removing the film in winter to protect it — a relevant alternative strategy, to be decided according to your garden’s real exposure.
These answers close out the final questions. All that’s left is to choose your starting point — and move on to production.
Move to production: summary and next step
What to remember
The polytunnel remains the vegetable-garden equipment with the best surface-to-price ratio: €150 to €800 for 15 to 30 m² in PE film, assembly in one day for two people, and a thermal gain that stretches the season from February to December. Check the planning rules with the town hall before buying, plan ventilation and shading at the model-selection stage, and budget for cover replacement every 3 to 5 years. On these foundations, the investment typically pays for itself within one to three years of real production.
The 4 non-negotiable criteria
- Floor area suited to your profile: 6–10 m² to start out, 12–18 m² in family format.
- Galvanized frame of at least 25 mm, with tight hoop spacing (1–1.5 m).
- 200 micron anti-UV PE cover.
- Anchoring sized for the wind — and the PLU checked with the town hall.
Why the 22 m² hydroponic greenhouse changes the scale
The soil tunnel extends the season; the hydroponic tunnel changes the scale. On the same 22 m² footprint, vertical towers multiply the number of plants, short cycles eliminate the dead seasons, recirculated water answers the restrictions, and the absence of soil-borne diseases makes production reliable — up to an order of magnitude of 500 kg/year of leafy crops in a well-run setup, versus a few dozen kilos for the same surface in classic monoculture. The difference lies between “having a greenhouse” and “growing your own plant food”, with technical monitoring (pH, nutrient solution) that a motivated beginner masters in a few weeks — and, no doubt, provided they stick with it.
So, back to your spring: seedlings overflowing, plants waiting, the season slipping away? In a few minutes, you can find out whether 500 kg a year fits in your garden — or whether a classic tunnel at €450 is enough for your ambitions.
👉 Move to production: configure your 22 m² hydroponic greenhouse and receive your personalized quote — number of towers, crop selection, irrigation and start-up support included.
The sun, for its part, is already at work.
Sources and references
Official and institutional sources (regulatory framework and verifications):
- service-public.fr — official portal for administrative procedures: prior declaration, planning permission, development tax.
- Town Planning Code, article R. 421-9 — Légifrance.
- vigieau.gouv.fr — official map of water-use restrictions.
- To dig deeper into the agronomic and statistical data: inrae.fr, agreste.agriculture.gouv.fr, ademe.fr. Transparency note: no institutional quantitative study specifically devoted to the garden polytunnel could be included in this guide; the “INRA”, “Ifop” and “Ministry of Agriculture 2021” statistics circulating on some blogs could not be verified and were discarded.
Specialist sources consulted (2025–2026 corpus, commercial figures to be confirmed by quote):
- Serre2Jardin — tunnel types, prices, cover lifespans, thermal gain.
- Habitats Durables — 2026 buying guide: floor areas by profile, assembly, calendar, maintenance.
- Habitatio — complete costing method, planning rules, orientation (cites the RHS and VigiEau).
- Mantis — structural specifications, 200 micron cover, yields (single-source figures flagged).
- AutourduPotager — usable dimensions, anchoring, rotation, winter crops.
- Mon Jardin Mon Potager — winter use, film lifespans, heating.
- La Ferme du Fays — price per m² for pro tunnels and rigid greenhouses.
- Les Serres du Don / Les Serres du Cédon — Pro ranges, prices of €40–75/m².
- France Serres — half-moon / straight-side comparison.
- Lutte Bio — soil preparation and amendments.
The yield figures (+30–50 %, tomatoes 5-8 kg/plant), the thermal gain (3-10 °C depending on the sources) and the 22 m² ≈ 500 kg/year hydroponic simulation are order-of-magnitude figures of commercial origin, flagged as such in the text and to be validated against your situation by quote and trial.
SEO sheet — Suggested title: “Polytunnel: The Complete Guide (Benefits, Sizes, 2026 Alternatives)” · Meta description: “Polytunnel: benefits, sizes, prices, growing calendar and a more productive hydroponic alternative. The complete 2026 guide to choosing, installing and making your garden tunnel pay off.” · Main keyword: polytunnel · Secondary: garden tunnel, growing tunnel, greenhouse cover, galvanized frame, plastic tunnel, reinforced cover.
Ready to Grow Your Own Vegetables All Year Round?
Discover our soil-less growing solutions, aeroponic greenhouse or indoor hydroponic cabinet, and take the path to food self-sufficiency without pesticides.